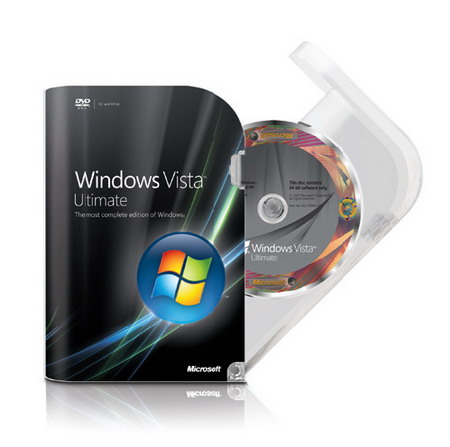
WINDOWS VISTA RECOVERY DISK STEP BY STEP GUIDE
![]()
|
|
 |
||||||||||||
| Posted:2007-06-19 By Windows Number of View:377836 |
|||||||||||||
By :Windows Posted:2007-06-19
Original writer of this review Clubic.com (By Julien Jay ). Officially windows vista was released in 2007 . AND since many start to actively use this new operating system. Most today sold notebook and computer come with windows vista. This new Microsoft system have a very pleasant interface in addition to the directx 10 support , witch will be used in next generation game . So it is a good idea to have a recovery disk. Let us note that windows vista have an integrated recovery system , but if u don't have a disk under your hand this review will be useful , especially to recover your system. Windows EP CD Creation : Guide step by stepThis Guide is originally based on CD Windows EP, so as a start you have to
download the kit Windows Automated Kit Installation or just (AIK). Let us note that this disk has a IMG format and size 700 MB , So if u have a
traffic paid connection be aware. Now let us pass to the creation step , after
downloading the hole file , you have to burn the image using your favorite
burner or just mount it in any virtual disk tools such as (Daemon tool or
Alcohol) . After inserting the disk with image u have to follow the install
process with few click . 
Welcome Screen of Windows Automated Kit
Install process of Windows Automated Kit
1) From the menu start, click on All programs then Microsoft Windows AIK, (Start menu - ALL programs - Microsoft Windows AIK) . 2) Click on command prompt Windows EP tools; a new dos window opens up , then, Type the following : copype.cmd x86 c:\winpe_x86
3) This command will copy x86 folder in c:\winpe_x86.check your disk c : the folder winpe_x86 exist, then we continue. 4) Now type the following in new command prompt (Start menu - Run - cmd) or just press and hold the key windows and then press (r) then type (CMD) Now type following :copy "C:\Program Files\Windows AIK\Tools\x86\imagex.exe" "C:\winpe_x86\ISO" 5) Wait a bit for the previous command to be done , now create a new text pad file (right click in your desktop - New - text document ) or just press and hold the key windows and then press (r) then type (notepad) . This is required to create the list of exception ( files excluded from your Windows EP disc ). Copy and paste the following lines in the text document file : [ExclusionList] [CompressionExclusionList]
In Windows EP command prompt tools , type the following command : oscdimg -n -bC:\winpe_x86\etfsboot.com C:\winpe_x86\ISO C:\winpe_x86\winpe_x86.iso
This command will compile our various files necessary to the Windows EP disc
before generating an ISO format image file
Image Burn in process using Nero Windows EP : Creation of USB start up diskThe previous procedure described how to make a recovery windows vista disk , but it is also possible to make a usb bootable flash disk witch contain the file necessary for recovery process . The step are pretty similar to previous one , First u have to download To download the kit Windows AIK .Then mount this image in any virtual disk tool or burn it in a disk . the same procedure as above : After inserting the disk with image you have to follow the install process
with few click .
Welcome Screen of Windows Automated Kit
Install process of Windows Automated Kit
1) From the menu start, click on All programs then Microsoft Windows AIK, (Start menu - ALL programs - Microsoft Windows AIK) . 2) Click on command prompt Windows EP tools; a new dos window opens up , then, Type the following : copype.cmd x86 c:\winpe_x86 3) This command will copy x86 folder in c:\winpe_x86.check your
disk c : the folder winpe_x86 excit, then we continue. 3) Format your disk using fat32 file system ( My computer - Right click on your USB flash disk - select format - select fat32 and then press start ) .With format all data from your USB flash disk will be removed . So if u have any important file make a back up before. To finish, type the following command:xcopy c:\winpe_x86\iso\*.* /s /e /f o:\ In this case , o:\ presents the path to our USB disk . Remember to replace
this letter (O) with the assigned by Windows to your USB disk. Let us note , the possibility to reach all data contained on your hard disk, and this without any administrator control :-) .
we would be happy to answer for your question . if you have suggestion or comment
regarding this review our support would be glad to help just join our forum and ask u will get the best answer
to discuss check our forum section :-) RATE THIS REVIEW | |||||||||||||
![]()

7600gt review
7600gt is the middle card range.
We already benchmarked this video card and found that ...

 geforce 8800gtx and 8800gts
  Xtreview software download Section
  AMD TURION 64 X2 REVIEW
  INTEL PENTIUM D 920 , INTEL PENTIUM D 930
  6800XT REVIEW
  computer hardware REVIEW
  INTEL CONROE CORE DUO 2 REVIEW VS AMD AM2
  INTEL PENTIUM D 805 INTEL D805
  Free desktop wallpaper
  online fighting game
  Xtreview price comparison center

- The new version of GPU-Z finally kills the belief in the miracle of Vega transformation
- The motherboard manufacturer confirms the characteristics of the processors Coffee Lake
- We are looking for copper coolers on NVIDIA Volta computing accelerators
- Unofficially about Intels plans to release 300-series chipset
- The Japanese representation of AMD offered monetary compensation to the first buyers of Ryzen Threadripper
- This year will not be released more than 45 million motherboards
- TSMC denies the presentation of charges from the antimonopoly authorities
- Radeon RX Vega 64 at frequencies 1802-1000 MHz updated the record GPUPI 1B
- AMD itself would like to believe that mobile processors Ryzen have already been released
- AMD Vega 20 will find application in accelerating computations
- Pre-orders for new iPhone start next week
- Radeon RX Vega 57, 58 and 59: the wonders of transformation
- ASML starts commercial delivery of EUV-scanners
- The older Skylake processors with a free multiplier are removed from production
- Meizu will release Android-smartphone based on Helio P40
- AMD Bristol Ridge processors are also available in American retail
- The fate of Toshiba Memory can be solved to the next environment
- duo GeForce GTX 1080 Ti in GPUPI 1B at frequencies of 2480-10320 MHz
- New Kentsfield overclocking record up to 5204 MHz
- Lenovo released Android-smartphone K8


computer news computer parts review Old Forum Downloads New Forum Login Join Articles terms Hardware blog Sitemap Get Freebies


